

Welcome to the BRI Blog and today's post with me, Janette Kausen. I am ecstatic to be here with you for my very first design team post - anywhere - ever! I, along with the other new and past design team members, hope to continue to lead you on an inspiring journey to a state of Creative Bliss. Join us!
Today's card is inspired by a phone call we received last week letting us know that a rather small size of our oranges (that no one seemed to want) is now being picked for a major coffee chain. I won't tell you who, but I'd bet some bucks you can figure it out!

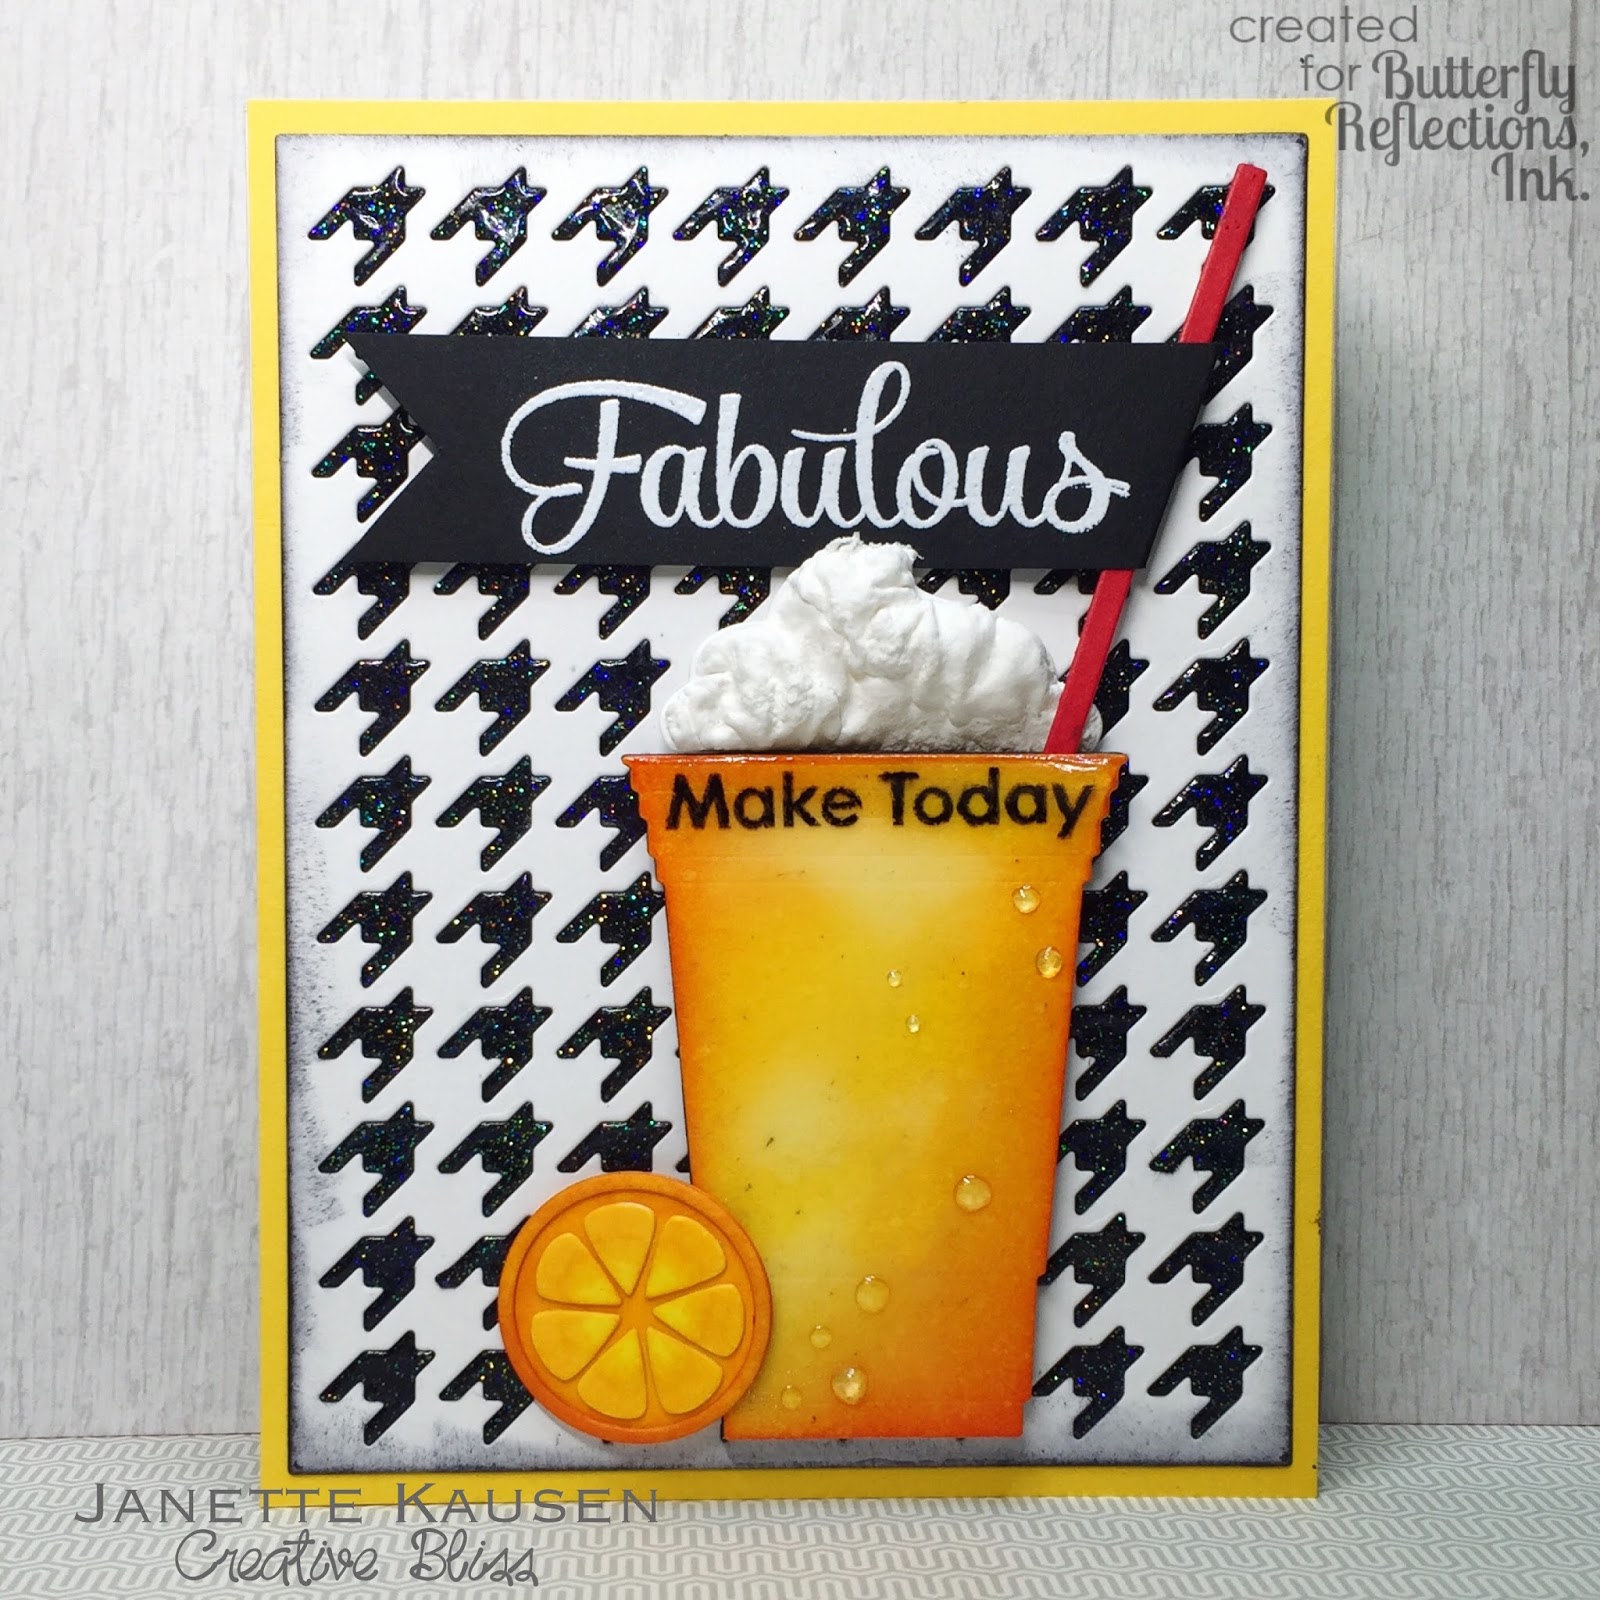
I'm not sure how they'll be using those baby oranges, but I can tell you how I pulled this refreshing card together. I began by heat embossing an entire 6"x6" black cardstock with Versamark ink, 1 coat of Ranger Black Sparkle embossing powder, 2 coats of Ranger Super Fine Clear embossing powder, Versamarking between each layer (Yes, it's worth it!!).
After die cutting 2x with MFT's Houndstooth Cover-Up, once with heavy white cardstock and once with the black embossed cardstock, assemble that classic background on a citrus-y cardstock. The teeth will fit like a puzzle piece, but add a drop of Multi Medium Matte adhesive to ensure they stay in their new home. Save your extras to assemble the reverse for another project. Once that is done, run the heat tool over the surface to shine up the black since it will be dull from die cutting.
I am a born and bred California girl and 50 degrees is just far too cold for my bones. Bring on the 100 degree days and a cool beverage like this one. Simply die cut the cup, straw and whipped cream from MFT's Cool Cup set and the orange slice from the Avery Elle Margarita Shaker die set. Distress inks in Spiced Marmalade and Squeezed Lemonade are perfect when blended together for the cup. Copic markers of Y06, YR68, and Y17 make up the orange slice. R29 is the perfect red for the straw. Two layers of clear embossing powder and a few drops of Glossy Accents give the cup a realistic look.

Today's card is inspired by a phone call we received last week letting us know that a rather small size of our oranges (that no one seemed to want) is now being picked for a major coffee chain. I won't tell you who, but I'd bet some bucks you can figure it out!
I'm not sure how they'll be using those baby oranges, but I can tell you how I pulled this refreshing card together. I began by heat embossing an entire 6"x6" black cardstock with Versamark ink, 1 coat of Ranger Black Sparkle embossing powder, 2 coats of Ranger Super Fine Clear embossing powder, Versamarking between each layer (Yes, it's worth it!!).
After die cutting 2x with MFT's Houndstooth Cover-Up, once with heavy white cardstock and once with the black embossed cardstock, assemble that classic background on a citrus-y cardstock. The teeth will fit like a puzzle piece, but add a drop of Multi Medium Matte adhesive to ensure they stay in their new home. Save your extras to assemble the reverse for another project. Once that is done, run the heat tool over the surface to shine up the black since it will be dull from die cutting.
I am a born and bred California girl and 50 degrees is just far too cold for my bones. Bring on the 100 degree days and a cool beverage like this one. Simply die cut the cup, straw and whipped cream from MFT's Cool Cup set and the orange slice from the Avery Elle Margarita Shaker die set. Distress inks in Spiced Marmalade and Squeezed Lemonade are perfect when blended together for the cup. Copic markers of Y06, YR68, and Y17 make up the orange slice. R29 is the perfect red for the straw. Two layers of clear embossing powder and a few drops of Glossy Accents give the cup a realistic look.

The whipped cream is easy peasy and super fun with the Marvy Snow Marker. Just press the tip on the die cut cream to express a generous puddle of liquid. Scribble around to fill the entire cut. Then, while hanging onto it with a pair of tweezers and keeping it flat, hold your heat tool 4"-6" above and allow to slowly heat. Watch while it magically whips up before your eyes!
Finish the card off by stamping the sentiments from MFT's Simply Fabulous Sayings stamp set. Trim "Fabulous" into flag shape, wrap around straw and glue in place. Assemble your card, popping up the cup and flag with your favorite method, and adhere to a card base. Voila, you are cool as a cucumber sipping on citrus in the bright spring sunshine!
Thanks for stopping by. Craft-on, my friends!
Comments
Post a Comment