
Critter Birthday Card!

 Hi everyone, Ashley here and I'm excited to be back on the Butterfly Reflections, Ink blog to share a card with you! 

My husband celebrated his birthday recently, and I wanted to make him a card with some personalization specific to him. So, I used lots of Lawn Fawn supplies to make a card featuring our three pets!


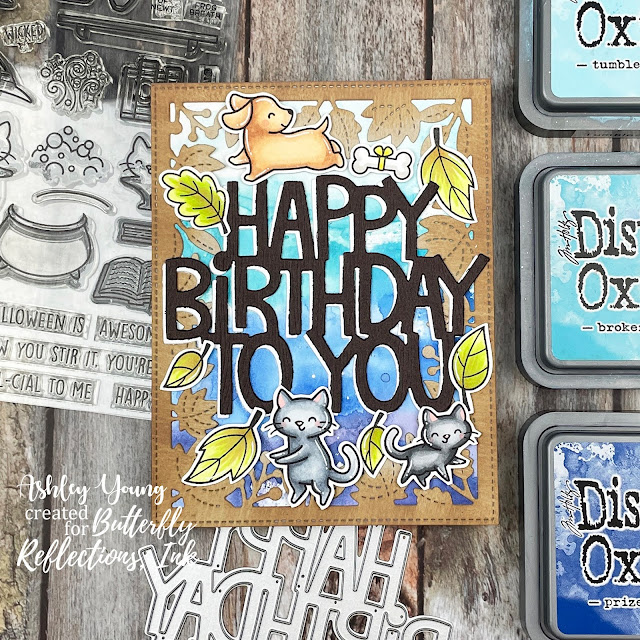
I started by watercolouring the background piece using Distress Oxide inks in Chipped Sapphire, Prize Ribbon, Broken China and Tumbled Glass. I smooshed some ink from each pad onto my work surface and sprayed them with water, and then just pressed the cardstock into the wet ink. I dried the panel using my heat tool, and then repeated this a few more times to get layers of colour. Ink smooshing is one of my favorite tried-and-true techniques for getting an easy watercoloured background!


Next I did some die-cutting: first, I die-cut a piece of kraft cardstock (I used Neenah Desert Storm) with the Lawn Fawn Fall Leaves Backdrop die. I brushed some Vintage Photo Distress Oxide ink in from the edges to give the piece a vintage look. Next, I die-cut one brown woodgrain and one white piece of cardstock using the Lawn Fawn Giant Happy Birthday To You die. The woodgrain paper I used was Lawn Fawn's Dark Brown Woodgrain cardstock. I glued these pieces together in a slightly-offset fashion, so that the white piece peeked out behind the brown piece.


Next, I did some stamping! I stamped out one of the dogs from the Lawn Fawn Furry and Bright stamp set, one of the cats from the Lawn Fawn Purrfectly Wicked stamp set and one more cat from the Lawn Fawn Purrfectly Wicked Add-On stamp set. I also stamped out some leaves from the Lawn Fawn You Autumn Know and Scripty Autumn Sentiments stamp sets. I used Gina K Amalgam ink in Obsidian for the stamping, and I coloured in the images with my Copic markers. These critters were meant to represent our three pets: our Golden Retriever Indiana, our Russian Blue Luna, and our old black cat Salem.


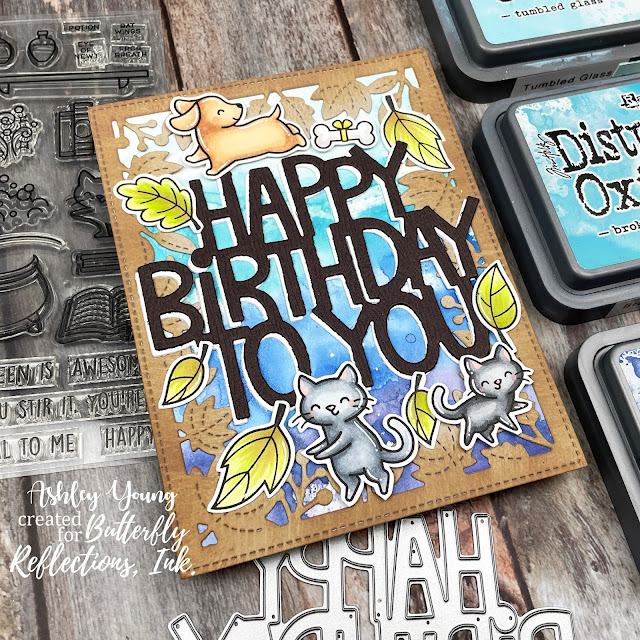
I used liquid glue to adhere all of the elements together, and then stuck the whole panel down onto an A2 card base!

I had so much fun making this card and sharing it with you here! Make sure to check out the Butterfly Reflections, Ink shop to shop for all the supplies I used to make this card. And, feel free to head over to either my Instagram account or my YouTube channel (or both!) if you'd like to see more of my creations.

Thanks for stopping by!


Comments

Popular posts from this blog

Baby Tags featuring the We R Memory Keepers Fuse Tool!

Happy Monday! This is Kim Hamilton and I am so very excited to be sharing my first post with you for Butterfly Reflections Ink! This is making my first day back to work after a two-week break a happy one! I am sharing baby gift tags today, one of my friends is expecting and not sure what she is having so I made one of each! I used my  We R Memory Keepers Fuse Tool  for the first time and loved it! I cut my own  Tim Holtz watercolor paper  to the size of tag I wanted (2 3/4 x 4 1/4) and cut the edges with my trimmer.  I stamped my sentiments that are by  Lawn Fawn Hello Baby  with VersaMark ink and used white embossing powder. For the girl tag I used a mix of Spun Sugar, Picked Raspberry and Abandoned Coral  Distress Inks  and for the boy tag I used Peacock Feathers, Cracked Pistachio and Twisted Citron  Distress Inks .  I sprayed both tags with some water and dabbed it off. I then stamped my images by My Favorite Things  Snuggle Bunnies  for the girl and Magical Dragons for th

Painting backwards....

Hello, hello!  Norine here from The Velvet Lemon blog .  It's been a week for introductions hasn't it, but let me just say how delighted I am to have been invited to join such a talented group of paper crafters, and to contribute here at Butterfly Reflections Ink!   Today I'm sharing with you, some cards I made by working backwards.  What do I mean, you wonder?  Well, it's a technique I sometimes enjoy doing, where you "smoosh" your water based ink pads on a craft mat, mist the colors with water and then drag your water color paper through it to create a pretty mess of color.     For today's cards, I wanted a blend of blues and greens (always a crowd pleaser) and yellows/pinks.  You will always be happier with the results when you keep the green/blues from overlapping with the yellow/pinks, because that just produces an unappealing mud color.   I used a variety of Tim Holtz Distress Inks for this project, but any water based inks w

Altenew’s 4th Anniversary Blog Hop Day 3 + Giveaway

Hey, hey BRI friends!  We're hopping today to celebrate the 4th Birthday of Altenew , one of our favorite stamping companies!  You should have arrived here from the Altenew blog , and we're glad you're here to share the excitement! There are prizes and inspiration and it's going to be FUN! With you today, is Norine from The Velvet Lemon  creating for Butterfly Reflections Ink  and I have some projects to share today, that I made using some recently released Altenew products .   First up, are these two cards created with the Mega Succulent stamp set .   I stamped the image onto water color paper using the MISTI , then turned on the music and sat and colored.   I used Faber Castell watercolor pencils so I could more easily control where the color would sit and then painted with a water brush .  I stamped the sentiment onto a piece of vellum, heat embossed with clear embossing powder to ensure that the ink wouldn't smudge, then tore the vel