

Well hello everyone!! Laurie here!!! I'm pretty happy that March is a long month, only because it gave me the opportunity to post here...I've missed you guys :)
I've really been drawn to clean and simple card making lately and am learning how to embrace white space. So let's get started!
I started by stamping the largest flower image from the Scandinavian Prints Stamp Set with Memento Tuxedo Black Ink onto white cardstock. I stamped the centres of the flowers onto a scrap of yellow cardstock, also using black ink. I left the flowers white but to take away a bit of the starkness, I used a cool grey alcohol marker around the edges and blended it out with a colourless blender. I used the Co-ordinating Dies to cut each image out. For the leaves, I used the new Medallion Flower Builder Dies. I chose two of the leaves with the open centres and the three other small solid leaves. These were all cut out with a light grey cardstock.
Once all the cutting was done, I moved onto the front panel. I used the smallest dot image from the Medallion Flower Builder Stamp Set and the Mini Dots Stencil. I lined the stencil up on my panel and stamped over the dots I wanted. The dots don't stamp perfectly but it gives a great guide on where to stamp!


I could have blended over the stencil, but I really like the crisp results of stamping!
I adhered my flowers and leaves with a combination of tape runner and foam adhesive toward the left hand side of the panel.
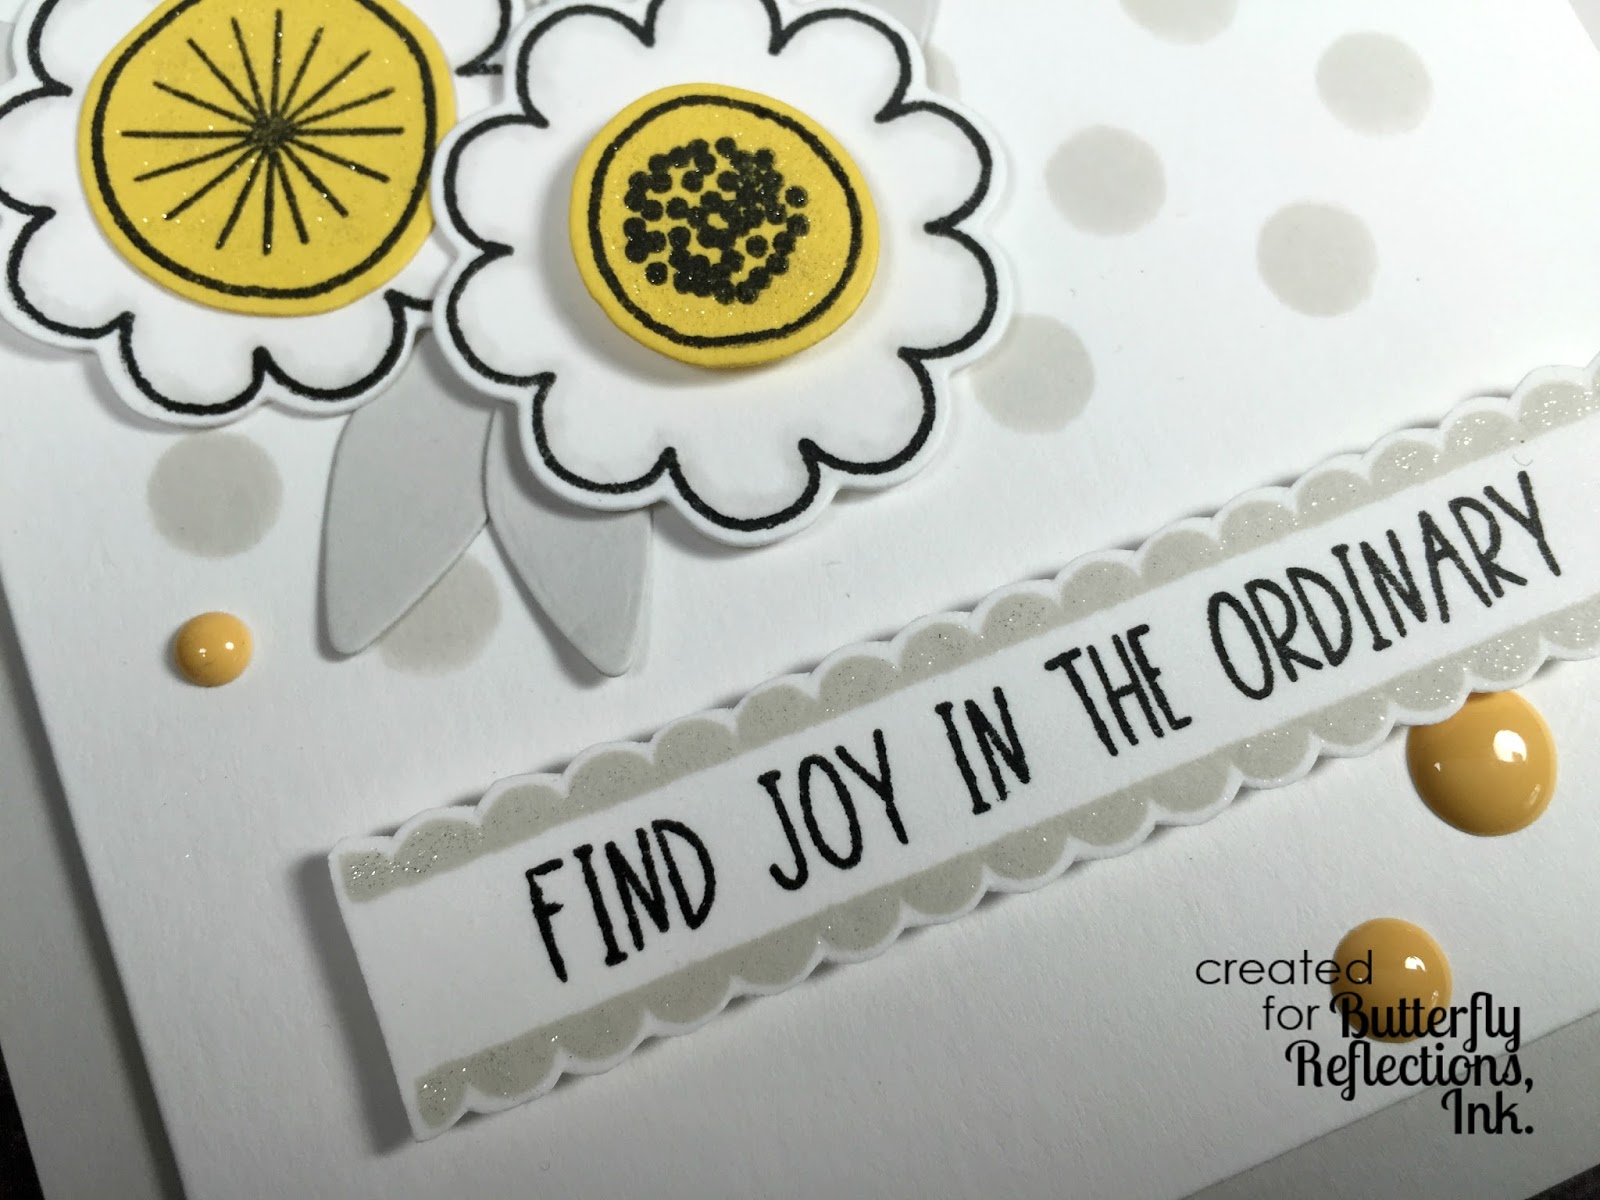
To make the sentiment stand out, I used the super cute Holiday Ribbons stamp set from Right at Home. This creates the scalloped borders. The sentiment fit PERFECTLY!! I fussy cut that cute strip out and foam mounted it under the flowers. To add another little pop of yellow, I used enamel dots from Snow Fun. And of course, some sparkle was added to the centre of the flowers and the sentiment border with Clear Wink of Stella!!
So finally, here's the finished product...


I really love all the white, subtle grey and the pops of yellow.
Thank you so much for stopping by today!! I had a blast creating this card for BRI!!
Laurie
love the color combo of this card. Thanks to Butterfly Reflections for sponsoring the Coffee Lovers Hop!
ReplyDeleteBeautiful. I love the sentiment.
ReplyDeleteThis is so pretty! Gray and yellow is one of my favorite combos!
ReplyDelete