

Good morning, everyone, Amy Copeland here today with a colorful birthday card featuring stamps from My Favorite Things. I started my card by coloring in the cute bird image from the Toucan Do It stamp set. I stamped it with Jet Black ink from Lawn Fawn onto smooth white cardstock and colored it in with Copic Markers. I used the Coordinading Toucan Do It dies to cut out the bird. As per usual, I added some finishing details with my Wink of Stella clear glitter brush pen and Glossy Accents. I also used my new black Glaze Pen on the eye to give it a shiny, glossy black finish. I had one of these in the past, but it must have dried out and it never worked right. I was thrilled to get this new one and have it work right out of the gate. :)
Next, I got to work on my background panel. I used my MISTI to stamp the triangle-pattern stamp onto smooth, Bristol cardstock, first with Squeezed Lemonade Distress Oxide ink. I then used my Lawn Fawn Stamp Shammy to clean the stamp really well and left it in the MISTI in the exact same position as before. I then used Carved Pumpkin Distress Oxide and lightly tapped it onto the stamp in an angled position, so I didn't get complete coverage on the stamp (sort of like the rock-and-roll technique). This is where the MISTI comes in really handy--I was able to stamp directly down onto the original stamped impression to give it a two-tone effect. I then cleaned the stamp again really well with the Stamp Shammy and rotated it the opposite way, lined it up on my card panel where I wanted it to go, and repeated these steps using Faded Jeans and Broken China Distress Oxides. The pink row was done with Abandoned Coral and Candied Apple Distress Oxides. I repeated these steps, alternating colors in each row, until the bottom half of my panel was covered with the triangle pattern.
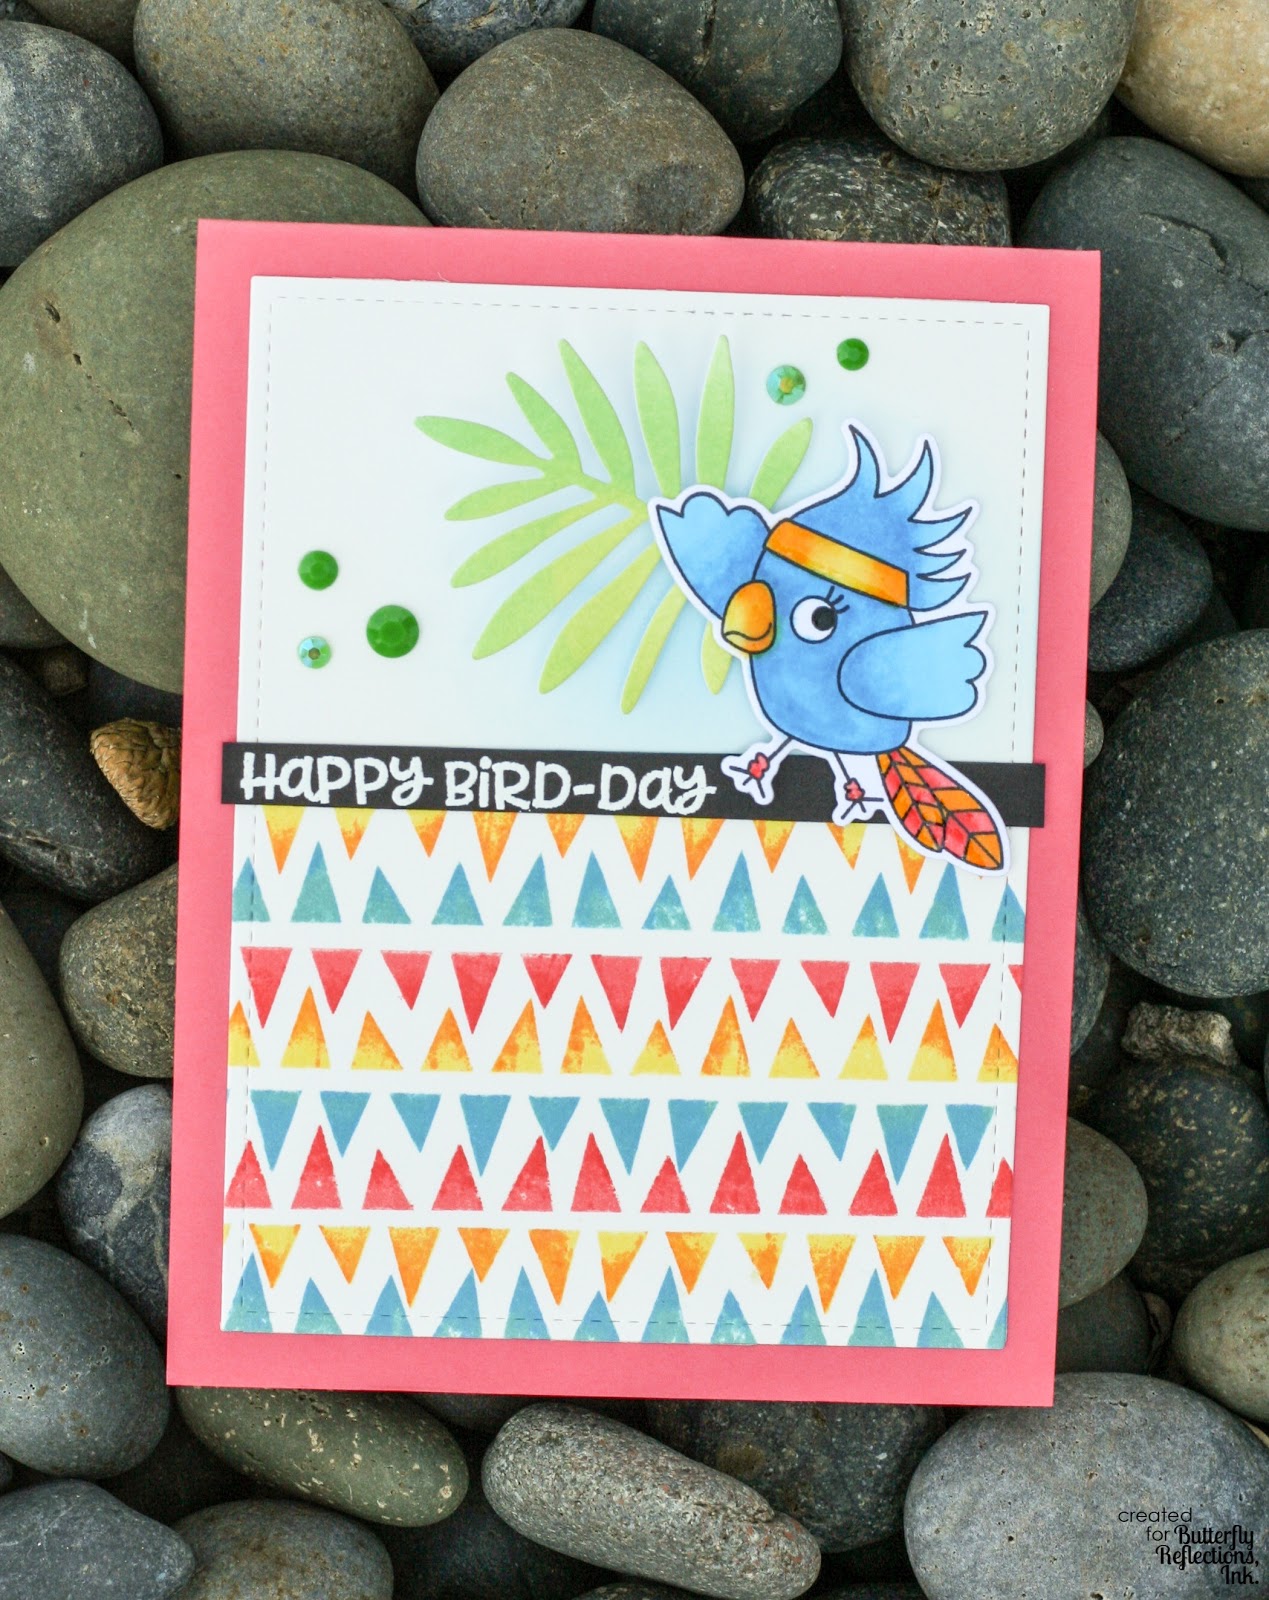
Once my card panel was stamped, I used a stitched rectangle die to cut out the panel. These and these are great options. In order to give the top of my card panel a little interest, I used my Mini Ink Blending Tool to lightly blend Salty Ocean Distress Oxide in a centralized circle right about where I was going to adhere the bird.
Next, I got to work on my sentiment. I took a piece of Lawn Fawn Black Licorice card stock and stamped the sentiment with VersaMark ink. I coated the clear, sticky ink with Lawn Fawn's White Embossing Powder and used my Heat Tool to set it until it was smooth and melted. I trimmed the sentiment down with my paper trimmer into a strip and glued it down with Mono Multi liquid glue. I created my card base out of Lawn Fawn Guava cardstock, in a top-folding, A2-size standard card base (4 1/4 x 5 1/2). I used the same Mono Multi glue to adhere my card panel onto the card base--I have been loving using liquid glue lately for things like this--I used to be a die-hard tape runner girl, but the liquid glue gives you a little more wiggle room to make sure it's absolutely straight before it's firmly adhered. Just make sure you use a light hand so it doesn't gush out the sides or warp your paper. :)

Next, I got to work on the leaf. I used Twisted Citron and Lucky Clover Distress Oxides along with my mini ink blending tool to lightly apply the ink onto a scrap of white cardstock. Once I was happy with the blend, I used a die in the MFT Stamps Wild Greenery set to cut the leaf out (I couldn't find this exact die set in the store, but this Tropical Foliage die set by Hello Bluebird is a pretty close dupe).

Finally, I adhered the rest of the elements to the card. I used Mini Glue Dots for my leaf and the bird. The final finishing touch was a scattering of May Emerald Green Birthstone Crystals by Studio Katia. There is a mix of three different finishes in the beautiful emerald green color--there's an opaque one, an iridescent one, and a transparent one. I used the opaque and iridescent jewels on this particular card. Thanks for joining me today for this fun "bird-day" card--hope you enjoyed it and that it inspires you to create your own. See you next week! :)
Comments
Post a Comment