
Tropical Birthday Card with WPlus9

Happy Wednesday! Lindsay here on the Butterfly Reflections, Ink blog today with a card using some of the newer products from WPlus9 to make a summery, tropical birthday card. 


I started off this card by stamping the background stamp from the Tropic Fever Stamp Set using Versafine Onyx Black Ink onto Neenah Solar White 80# card stock. I first treated the card stock with an anti-static powder tool as the plan was to emboss the background as I'm going for an ultra-shiny card design today. So after stamping the background I used Brutus Monroe Icicle Embossing Powder all over the image and heat set it. I then cut down to card base to 4" by 5.25" to leave a border around the edge which I backed with black card stock cut to A2 size.


For the main image, I used WPlus9 Hibiscus Bouquet, stamped with Memento Tuxedo Black Ink as it's a Copic Marker safe ink. I colored the images using R24, R29, R39 for the red hibiscus, Y13, Y15, Y17 for the yellow hibiscus, G05, G07, G09 for the monstera leaves and YG41 and YG45 for the frond leaves. I also stamped and die cut some images from WPlus9 Tropic Fever Stamp Set as I wasn't sure what my plans were yet for my layout. I colored two of the bouquet images, but ended up deciding on the yellow and red bouquet. I fussy cut out the bouquet using Spring Cut Scissors which I think are a MUST for cutting out your own images.


After deciding on the yellow and red image, I added white details using a white gel pen. I really like doing this to images to really make them pop! After playing around with all the images for a little bit I decided that I liked the Hibiscus Bouquet image on it's own the best for this card, so the other images were set aside for another card. 


I adhered the black card stock to my card base, and then the stamped and embossed card panel was adhered using foam for a little dimension. Then the bouquet image was adhered using foam tape. The sentiment from MFT Essential Sentiments was stamped using Versamark Ink and embossed with Brutus Monroe Alabaster Embossing Powder and heat set.


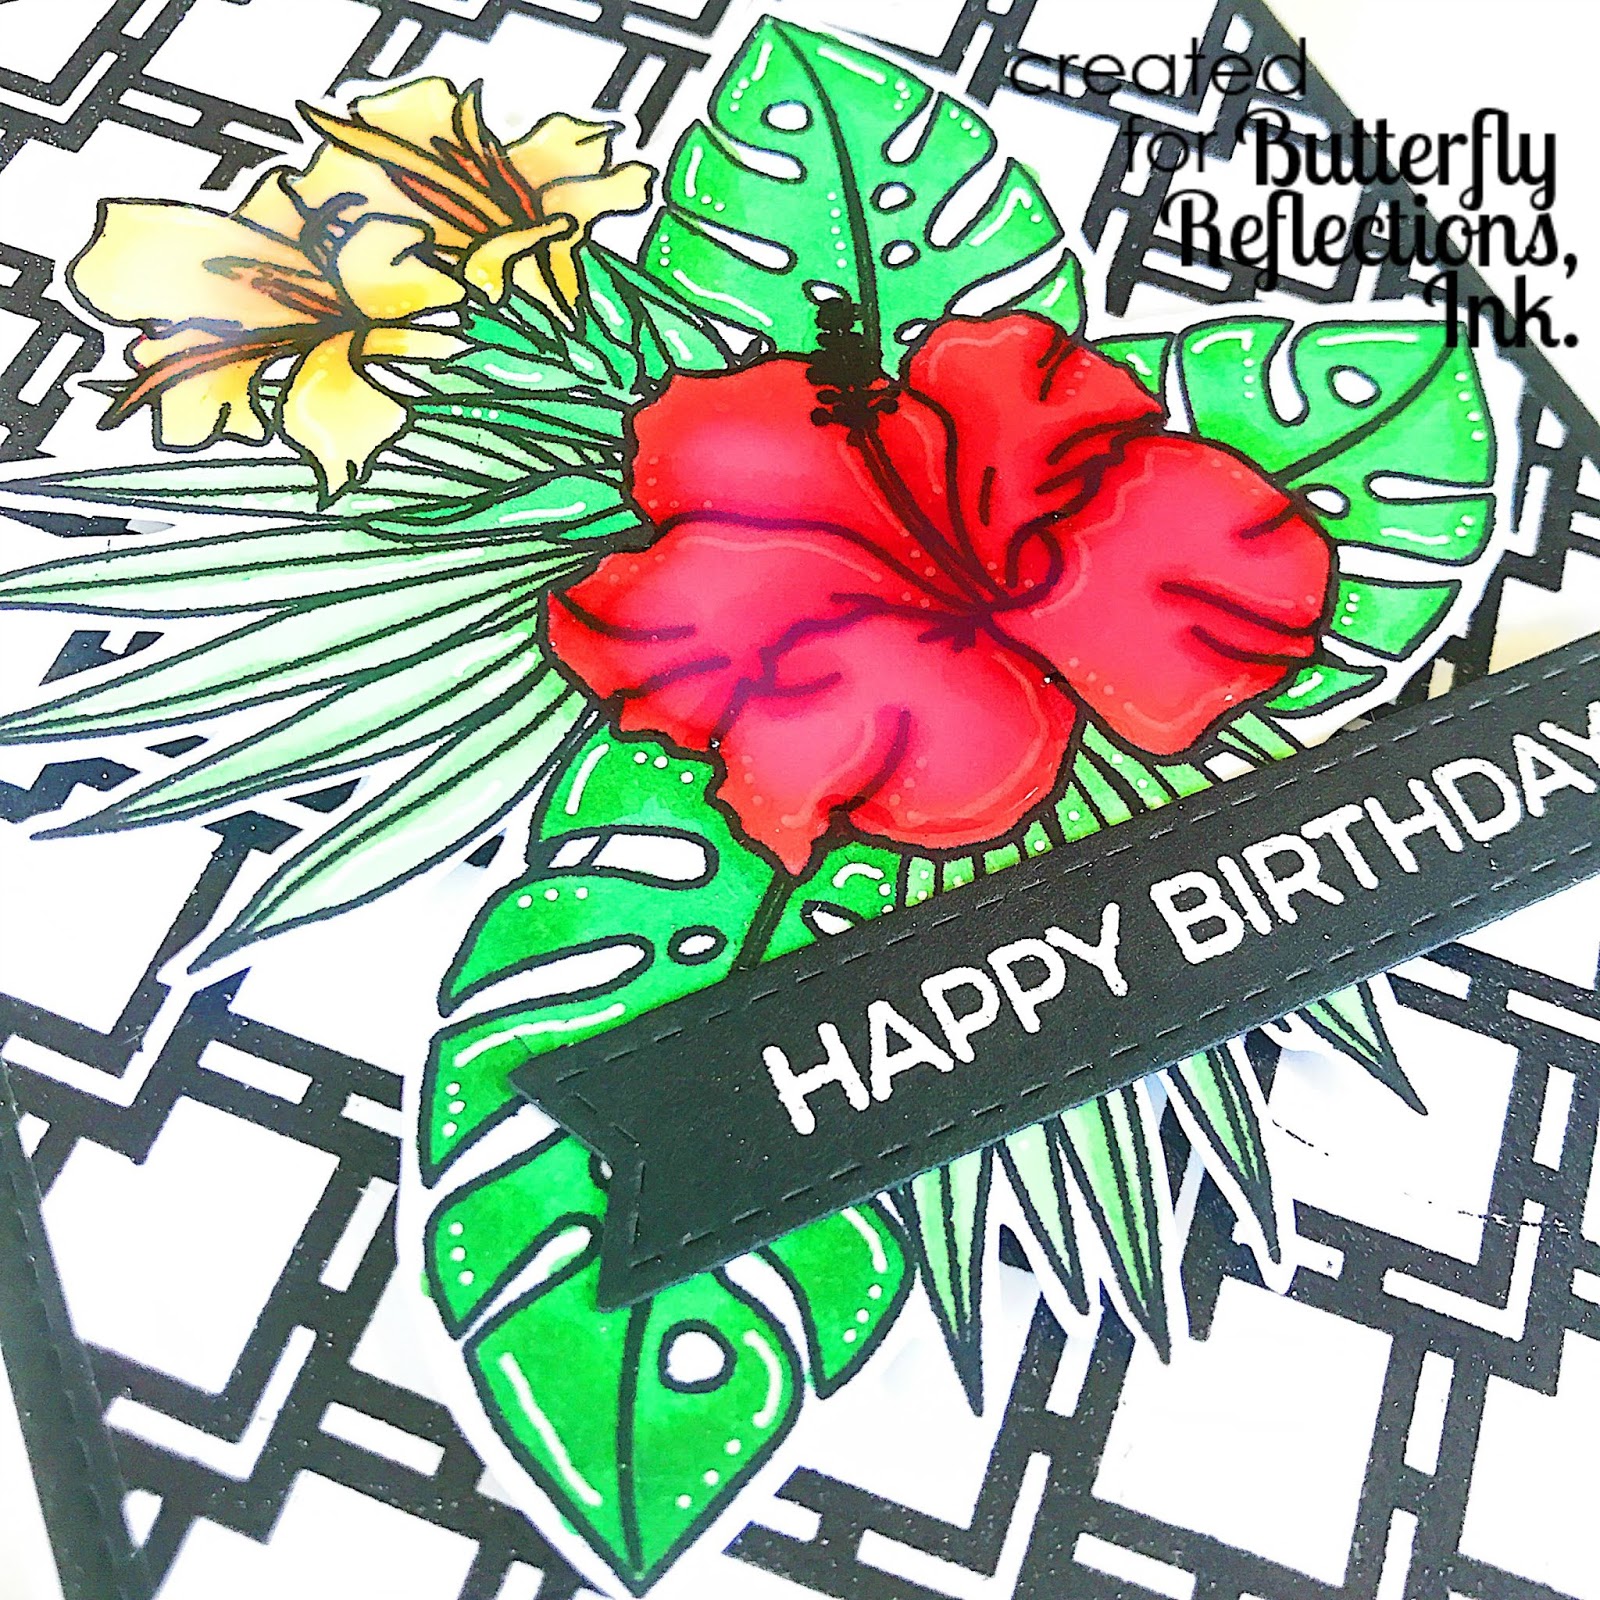
As a finishing touch I added Nuvo Crystal Glaze to the flowers (like I said earlier, I was going for an uber-shiny card!) So there's my card for today! I hope you guys are having a great week and I'll see you next Wednesday!

Aloha,
Lindsay


Comments

Popular posts from this blog

Baby Tags featuring the We R Memory Keepers Fuse Tool!

Happy Monday! This is Kim Hamilton and I am so very excited to be sharing my first post with you for Butterfly Reflections Ink! This is making my first day back to work after a two-week break a happy one! I am sharing baby gift tags today, one of my friends is expecting and not sure what she is having so I made one of each! I used my  We R Memory Keepers Fuse Tool  for the first time and loved it! I cut my own  Tim Holtz watercolor paper  to the size of tag I wanted (2 3/4 x 4 1/4) and cut the edges with my trimmer.  I stamped my sentiments that are by  Lawn Fawn Hello Baby  with VersaMark ink and used white embossing powder. For the girl tag I used a mix of Spun Sugar, Picked Raspberry and Abandoned Coral  Distress Inks  and for the boy tag I used Peacock Feathers, Cracked Pistachio and Twisted Citron  Distress Inks .  I sprayed both tags with some water and dabbed it off. I then stamped my images by My Favorite Things  Snuggle Bunnies  for the girl and Magical Dragons for th

Painting backwards....

Hello, hello!  Norine here from The Velvet Lemon blog .  It's been a week for introductions hasn't it, but let me just say how delighted I am to have been invited to join such a talented group of paper crafters, and to contribute here at Butterfly Reflections Ink!   Today I'm sharing with you, some cards I made by working backwards.  What do I mean, you wonder?  Well, it's a technique I sometimes enjoy doing, where you "smoosh" your water based ink pads on a craft mat, mist the colors with water and then drag your water color paper through it to create a pretty mess of color.     For today's cards, I wanted a blend of blues and greens (always a crowd pleaser) and yellows/pinks.  You will always be happier with the results when you keep the green/blues from overlapping with the yellow/pinks, because that just produces an unappealing mud color.   I used a variety of Tim Holtz Distress Inks for this project, but any water based inks w

Altenew’s 4th Anniversary Blog Hop Day 3 + Giveaway

Hey, hey BRI friends!  We're hopping today to celebrate the 4th Birthday of Altenew , one of our favorite stamping companies!  You should have arrived here from the Altenew blog , and we're glad you're here to share the excitement! There are prizes and inspiration and it's going to be FUN! With you today, is Norine from The Velvet Lemon  creating for Butterfly Reflections Ink  and I have some projects to share today, that I made using some recently released Altenew products .   First up, are these two cards created with the Mega Succulent stamp set .   I stamped the image onto water color paper using the MISTI , then turned on the music and sat and colored.   I used Faber Castell watercolor pencils so I could more easily control where the color would sit and then painted with a water brush .  I stamped the sentiment onto a piece of vellum, heat embossed with clear embossing powder to ensure that the ink wouldn't smudge, then tore the vel