
Out of this World Slider Window Card!!

Hello Friends Waleska from craftinglovew here!!! I am so happy to be back and share a card for Butterflyreflections ink blog today!!! And I am so excited to share with you the slider galaxy card I created with the amazing new Sliding Window die from Sunny Studio Stamps and the cutest Astronauts from Reverse Confetti... If you are still deciding if you need this die in your stash, let me tell you how amazing it works and show you how amazing it looks....


CARD DETAILS:

I started this card by cutting a piece of white watercolor cardstock in 5 1/2" x 4 1/4".  I wanted to create a galaxy sliding window so I embossed some stars with Silver Embossing Powder from the Moon Man set.   I then combined Oxide Inks and Nuvo Shimmer Powders.  To create the background I used Oxide Inks Wilted Violet, Blueprint Sketch and Peacock Feathers, I then put some of the Violet Brocade Nuvo Shimmer Powder and added a lot of water, this colors look beautiful together because they have some of the same tones.   I dry  this piece with my heat gun.  After the galaxy was done I  put the Sliding Window die and the half circle die in the middle of this piece and run it into my die cut machine, that gives you the top part of the sliding window, after that you need to score the half and bottom score lines from this die.


I created another piece of this galaxy while all the colors where out to put inside of the Sliding Wildow in the exact same colors and stamped the sentiment I wanted to reveal.  I adhere the sliding piece to a black A2 card base with double sided adhesive I put on the sides and bottom.  After that I put glue to the inside galaxy piece I created and slided from the top so it can fit perfectly inside the sliding mechanism.  I used the Gansai Tambi Starry Colors to create the stars with a brush.


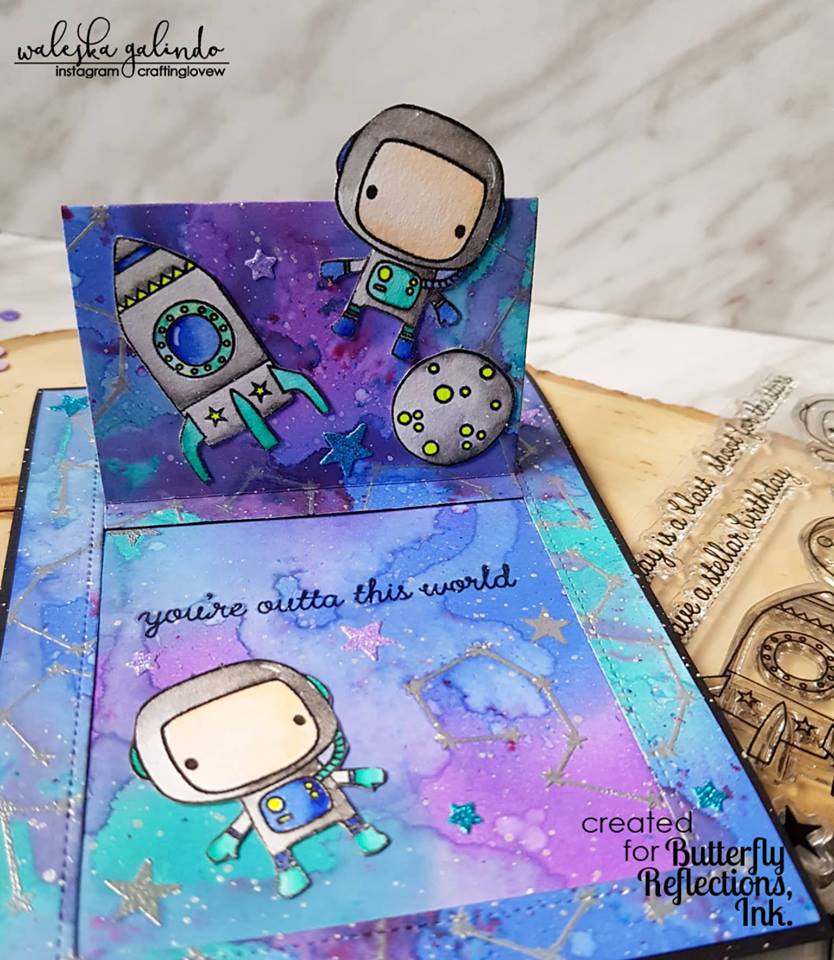
I used Zig Clean Color Real Brush Markers to color all the images I wanted to put on my card.  I used colors:
030 Blue
094 Gray Brown
001 Fl Yellow
042 Turquoiso Green
071 Flesh Color

I finally adhere the moon man, spaceship and planet to the front and inside the sliding window card.  I put a little purple arrow to help the recipient know to pull and reveal the fun  sentiment surprise inside.


I had so much fun creating this card, I love this type of cards where the person receiving it gets a surprise either by sliding, shaking or any other interactive surprise don´t you?
I hope you like my card and be inspired by it to combine oxide inks and shimmer powders to create galaxy backgrounds and  great surprises for your loved ones!  Thanks for stopping by have a nice Saturday!!


Comments

Popular posts from this blog

Baby Tags featuring the We R Memory Keepers Fuse Tool!

Happy Monday! This is Kim Hamilton and I am so very excited to be sharing my first post with you for Butterfly Reflections Ink! This is making my first day back to work after a two-week break a happy one! I am sharing baby gift tags today, one of my friends is expecting and not sure what she is having so I made one of each! I used my  We R Memory Keepers Fuse Tool  for the first time and loved it! I cut my own  Tim Holtz watercolor paper  to the size of tag I wanted (2 3/4 x 4 1/4) and cut the edges with my trimmer.  I stamped my sentiments that are by  Lawn Fawn Hello Baby  with VersaMark ink and used white embossing powder. For the girl tag I used a mix of Spun Sugar, Picked Raspberry and Abandoned Coral  Distress Inks  and for the boy tag I used Peacock Feathers, Cracked Pistachio and Twisted Citron  Distress Inks .  I sprayed both tags with some water and dabbed it off. I then stamped my images by My Favorite Things  Snuggle Bunnies  for the girl and Magical Dragons for th

Painting backwards....

Hello, hello!  Norine here from The Velvet Lemon blog .  It's been a week for introductions hasn't it, but let me just say how delighted I am to have been invited to join such a talented group of paper crafters, and to contribute here at Butterfly Reflections Ink!   Today I'm sharing with you, some cards I made by working backwards.  What do I mean, you wonder?  Well, it's a technique I sometimes enjoy doing, where you "smoosh" your water based ink pads on a craft mat, mist the colors with water and then drag your water color paper through it to create a pretty mess of color.     For today's cards, I wanted a blend of blues and greens (always a crowd pleaser) and yellows/pinks.  You will always be happier with the results when you keep the green/blues from overlapping with the yellow/pinks, because that just produces an unappealing mud color.   I used a variety of Tim Holtz Distress Inks for this project, but any water based inks w

Altenew’s 4th Anniversary Blog Hop Day 3 + Giveaway

Hey, hey BRI friends!  We're hopping today to celebrate the 4th Birthday of Altenew , one of our favorite stamping companies!  You should have arrived here from the Altenew blog , and we're glad you're here to share the excitement! There are prizes and inspiration and it's going to be FUN! With you today, is Norine from The Velvet Lemon  creating for Butterfly Reflections Ink  and I have some projects to share today, that I made using some recently released Altenew products .   First up, are these two cards created with the Mega Succulent stamp set .   I stamped the image onto water color paper using the MISTI , then turned on the music and sat and colored.   I used Faber Castell watercolor pencils so I could more easily control where the color would sit and then painted with a water brush .  I stamped the sentiment onto a piece of vellum, heat embossed with clear embossing powder to ensure that the ink wouldn't smudge, then tore the vel