
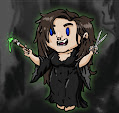
Hello crafty people! My name is Amanda, and I'm so excited to be joining the Butterfly Reflections Ink. Design Team for the 2019 Fall/Winter term! I want take a second to thank Vanessa for such a wonderful opportunity, and I hope I can inspire you all with my creations in the months to come.
Fall is my absolute favorite season, and it's what I get the most inspired for each year! I just love all of the smells, colors, clothes, food and of course the activities! One of my favorite fall activities is Movie Night! There's nothing like curling up in the dark with some snacks and a friend to watch a scary movie! Today I'm sharing a scene that depicts just that!

I started by stamping images from Lawn Fawn sets Toadally Awesome, and Screen Time using Memento Tuxedo Black Ink. If you're wondering what images I used from Toadally Awesome, the two cushions our little friends are sitting on are actually the large lily pad stamp! I colored the images using an assortment of alcohol markers and then added gel pen accents. Using scissors, I cut out the colored images to the black line. I didn't want to leave a white stroke behind because of the shadows that will be added at the end. After the images are cut out, use a black or dark grey marker to color the edges and cover up any white left behind.

For the background, I die cut the largest rectangle from Lawn Fawn's Small Dotted Rectangle Stackables on white cardstock. I inked all the way around the edges using Distress Ink Black Soot. To create the floor, I blocked off the top of the rectangle with a straight edged piece of scrap paper, and I blended Distress Ink Pumice Stone from the outer edges to the middle. This creates a subtle glow to imitate the lighting from a television. I flipped the straight edge stencil over to cover my freshly inked floor to start inking the wall. Using gradients of blue (Distress Ink Faded Jeans, Mermaid Lagoon, and Distress Oxide Tumbled Glass), I blended from the outer edges to the middle going from darkest to light. I went back and added more black soot to the edges afterwards because it got a bit dull after going over it so many times.

Next I measured out my cardbase. Folded, it measured at 4 3/16 X 5 1/2. Most people do this step first, but I always regret measuring my card out before I know how many images I want to use or how big my scene will end up being. I adhered my inked background to a black mat as to leave a small black stroke around the main scene. Then I adhered that to the cardface using my tape runner. I then stamped my sentiment on blue cardstock and cut it down before taping my sentiment to a slightly bigger, darker blue piece. Normally I would add my sentiment last, but for this scene I added it to my card first! Afterwards, I glued all my images to the cardface using tacky glue, except for the television which was added on with glue dots to help build it up. Lastly, but very importantly, I added shadows behind our little friends using a dark grey marker to really make them POP off the page!

Thanks for the read! If I've inspired you to create your own Fright Night scene or favorite fall activity card, be sure to tag me on Instagram @cavewomancreations I would love to see what you all create!!
Awesome Background !! I loved the addition of shadow too.
ReplyDeleteThank you so much!
Delete