

Morning crafty friends, it's Julianne here bringing you a super not so scary BOO card just in time for Halloween. Since Halloween is my favorite holiday I had to make sure to create a card to celebrate. I love the Mama Elephant Little Boo Agenda Stamp Set, all the ghosts are beyond cute. Mama Elephant offers a bunch of agenda sets if you want to check them out, they offer a bunch for multiple occasions.
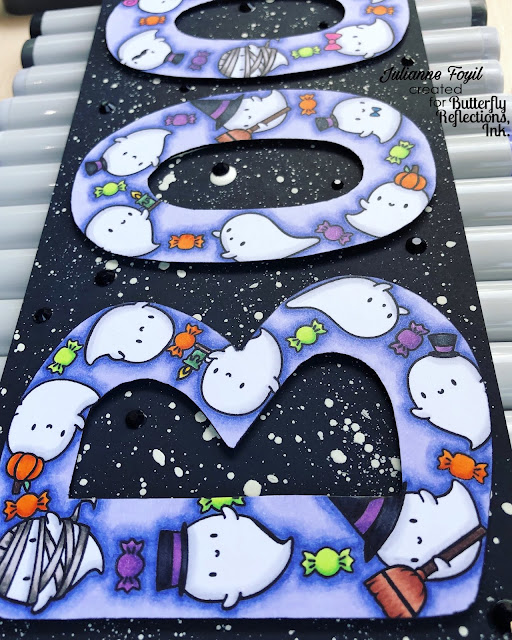
 I started out by drawing the word boo on some white card stock very lightly so that I could have an outline of where I wanted my images to go. I tried to use all the ghosts that came in the set when laying them out. Before stamping make sure to erase your pencil marks, once you add ink and/or start coloring you won't be able to erase them. Once I had stamped all the ghosts I used the two candy pieces that also come in the stamp set to stamp in between the ghost images.
 I colored in all the images using my copic markers, to make the BOO really stand out I also outlined the letters with 3 different shades of purple for a ombre effect. It was about this time that I got a little stumped and didn't know how to do the background, so I put it to the side and moved on to something else. If you ever have a moment like this I suggest that you just step away and come back.
 Once I had a moment to think I decided I wanted to cut out the letters to place on a black background to really make the letters pop. 😯 (Now that was super scary!) It took some time to get the letters just right but eventually I was able to figure them out. I took some white card stock and blended both Black Soot and Hickory Smoke Distress Oxide before splattering my background with white paint. I adhered the letters with some foam adhesive and added some black sequins to finish off the card.
 Thank you so much for stopping by to check out my not so scary card, make sure to check out the rest of the amazing inspiration from the other design team members on the Butterfly Reflections, Ink. Blog. If you haven't checked out the amazing Clearance Sale Butterfly Reflections is having, hurry on over for best selection; there are more than 90 pages of amazing products at some great prices.


Comments
Post a Comment