
Moodboard Inspiration with Peggy

Hello! My name is Peggy and this is my very first post as a design team member for Butterfly Reflections, Ink! I am so happy to be here among such talented crafters and hope to inspire you with my work! Today’s card is a thank you card inspired by this months gorgeous moodboard featuring rose gold, powder pink, icy mint and deep space blue.


I started by cutting a side folding slimline card base from white 300 gsm paper measuring 7 x 8.5 inch, scored at 3.5 inch using my EK success mini scoring board. From rose gold mirror board I cut a panel measuring 3.5 x 8.5 inch and a panel of white 300 gsm cardstock to do some ink blending measuring 3 x 8 inch.


Next I taped my panel to my Tim Holtz glass media mat (travel size). I used three colors of distress oxide pads, starting at the bottom with dried marigold, then spun sugar and tattered rose. I used my Lawn Fawn Cloudy Stencil and some chipped sapphire distress oxide ink to overlay a cloud pattern. Lastly, I used distress oxide black soot to darken the edges of the panel, to give it a nightly feel. I blend everything using my Tim Holtz mini ink blending tools.


Next I splattered my panel lightly with both white and rose gold watercolor paint with a broad paint brush. I cut a little ground piece from Lawn Fawn Paper Bag cardstock and die cut the top using Lawn Fawn Stitched Hillside Borders. Behind that I wanted to place a piece of grass, so I cut that from Lawn Fawn Sage Leaf cardstock and die cut the top with Lawn Fawn Simple Grassy Hillside Borders. I glued the grass and ground to my card panel and adhered the complete panel to the rose gold base using tape runner.


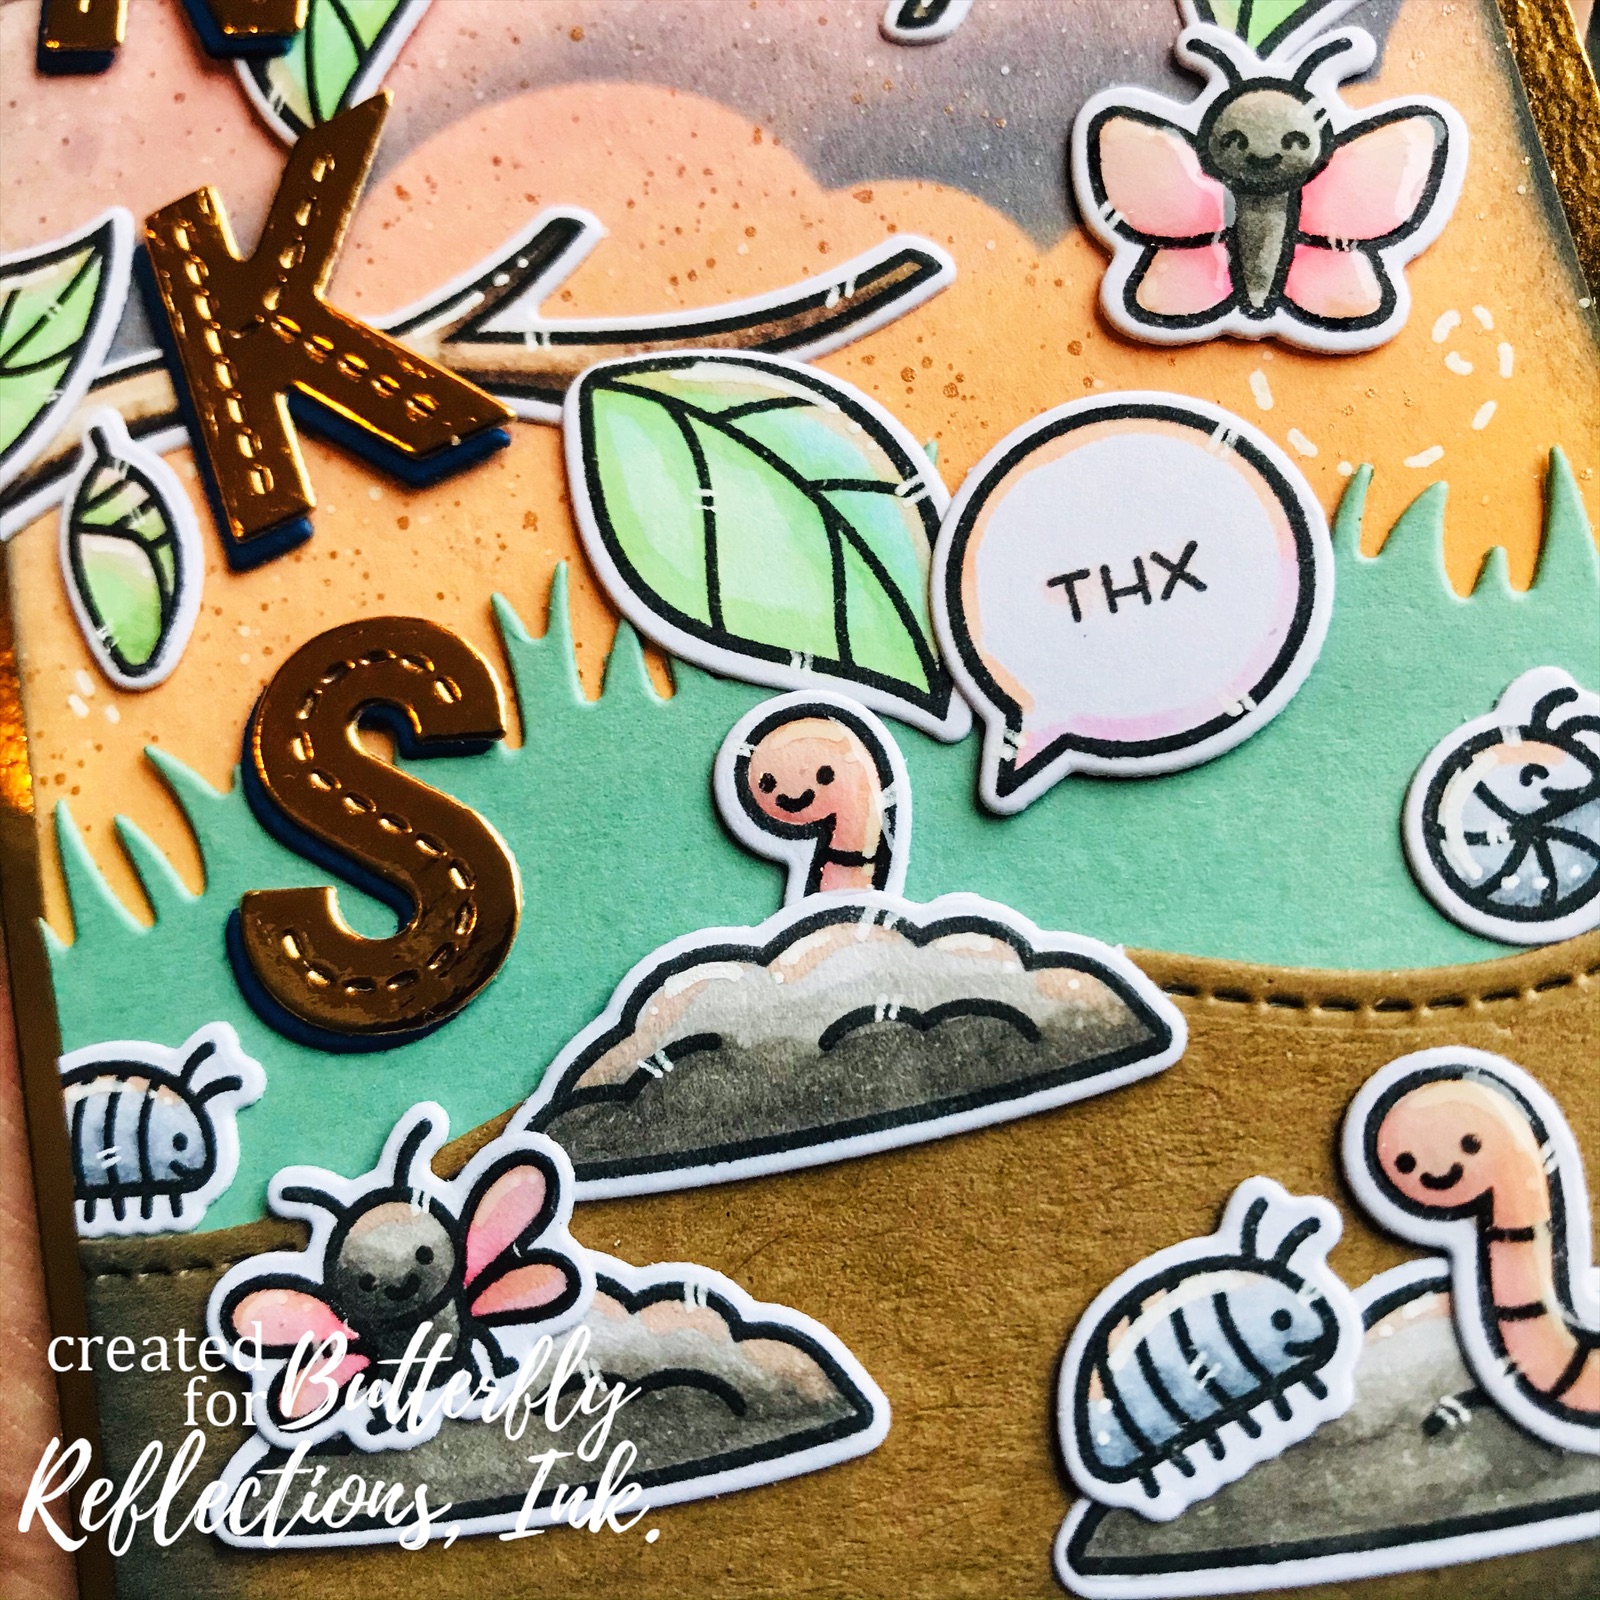
I used the super cute A Bug Deal stamp set from Lawn Fawn and stamped my images using alcohol marker friendly Lawn Fawn Jet Black Ink (My absolute favorite!). I colored using Copic markers and die cut the images using the coordinating A bug deal Lawn Cuts. I glue all the images to the card using Ranger Glossy Accents. I don’t know if I am the only one to use this product more as a glue than a finish, but I have tried many adhesives and this is my favorite because it dries very fast and is very sturdy.


To finish the card I cut the word Thanks using Lawn Fawn' s super versatile Oliver’s stitched abc from the rose gold mirror board as well as from Lawn Fawn Blue Jay cardstock. I adhered the rose gold to the blue jay and then to my card. To finish the card I used Nuvo Crystal Dimensional Glaze for some dimension and added highlights using a white gelly roll pen.


I hope you like my card and that you will join our monthly moodboard challenge on Instagram for a chance to win a $20 gift certificate to www.butterflyreflectionsink.com by posting your original card using the hashtag #brimoodboard and tag @brimoodboardchallenge. A winner will be randomly selected from the entries! Thanks for playing along and I will be back with another project next week!


Long distance hugs,


Peggy


(Come say hi @peggyemmerink on Instagram)


Comments

Popular posts from this blog

Baby Tags featuring the We R Memory Keepers Fuse Tool!

Happy Monday! This is Kim Hamilton and I am so very excited to be sharing my first post with you for Butterfly Reflections Ink! This is making my first day back to work after a two-week break a happy one! I am sharing baby gift tags today, one of my friends is expecting and not sure what she is having so I made one of each! I used my  We R Memory Keepers Fuse Tool  for the first time and loved it! I cut my own  Tim Holtz watercolor paper  to the size of tag I wanted (2 3/4 x 4 1/4) and cut the edges with my trimmer.  I stamped my sentiments that are by  Lawn Fawn Hello Baby  with VersaMark ink and used white embossing powder. For the girl tag I used a mix of Spun Sugar, Picked Raspberry and Abandoned Coral  Distress Inks  and for the boy tag I used Peacock Feathers, Cracked Pistachio and Twisted Citron  Distress Inks .  I sprayed both tags with some water and dabbed it off. I then stamped my images by My Favorite Things...

Painting backwards....

Hello, hello!  Norine here from The Velvet Lemon blog .  It's been a week for introductions hasn't it, but let me just say how delighted I am to have been invited to join such a talented group of paper crafters, and to contribute here at Butterfly Reflections Ink!   Today I'm sharing with you, some cards I made by working backwards.  What do I mean, you wonder?  Well, it's a technique I sometimes enjoy doing, where you "smoosh" your water based ink pads on a craft mat, mist the colors with water and then drag your water color paper through it to create a pretty mess of color.     For today's cards, I wanted a blend of blues and greens (always a crowd pleaser) and yellows/pinks.  You will always be happier with the results when you keep the green/blues from overlapping with the yellow/pinks, because that just produces an unappealing mud color.   I used a variety of Tim Holtz Distress Inks for this project, but any wate...

Altenew’s 4th Anniversary Blog Hop Day 3 + Giveaway

Hey, hey BRI friends!  We're hopping today to celebrate the 4th Birthday of Altenew , one of our favorite stamping companies!  You should have arrived here from the Altenew blog , and we're glad you're here to share the excitement! There are prizes and inspiration and it's going to be FUN! With you today, is Norine from The Velvet Lemon  creating for Butterfly Reflections Ink  and I have some projects to share today, that I made using some recently released Altenew products .   First up, are these two cards created with the Mega Succulent stamp set .   I stamped the image onto water color paper using the MISTI , then turned on the music and sat and colored.   I used Faber Castell watercolor pencils so I could more easily control where the color would sit and then painted with a water brush .  I stamped the sentiment onto a piece of vellum, heat embossed with clear embossing powder to ensure that the ink wouldn't smudge...