
Hi friends! Beata June here, and I'm sending you all sweet cookie wishes with this Lawn Fawn slimline card inspired by this month's moodboard.
Who doesn't love chocolate chip cookies? 🍪🍪
To make this card I used the following Lawn Fawn goodies:
- Lawn Fawn Special Delivery stamp set
- Lawn Fawn Special Delivery Box Add-On stamp set (coordinating die available here)
- Lawn Fawn A Creature Was Stirring stamp set (coordinating die available here)
- Lawn Fawn Dandy Day stamp set (coordinating die available here)
- Lawn Fawn Milk and Cookies stamp set (coordinating die available here)
- Lawn Fawn How You Bean? stamp set (coordinating die available here)
For inspiration, I used this month's bri moodboard to make my card.

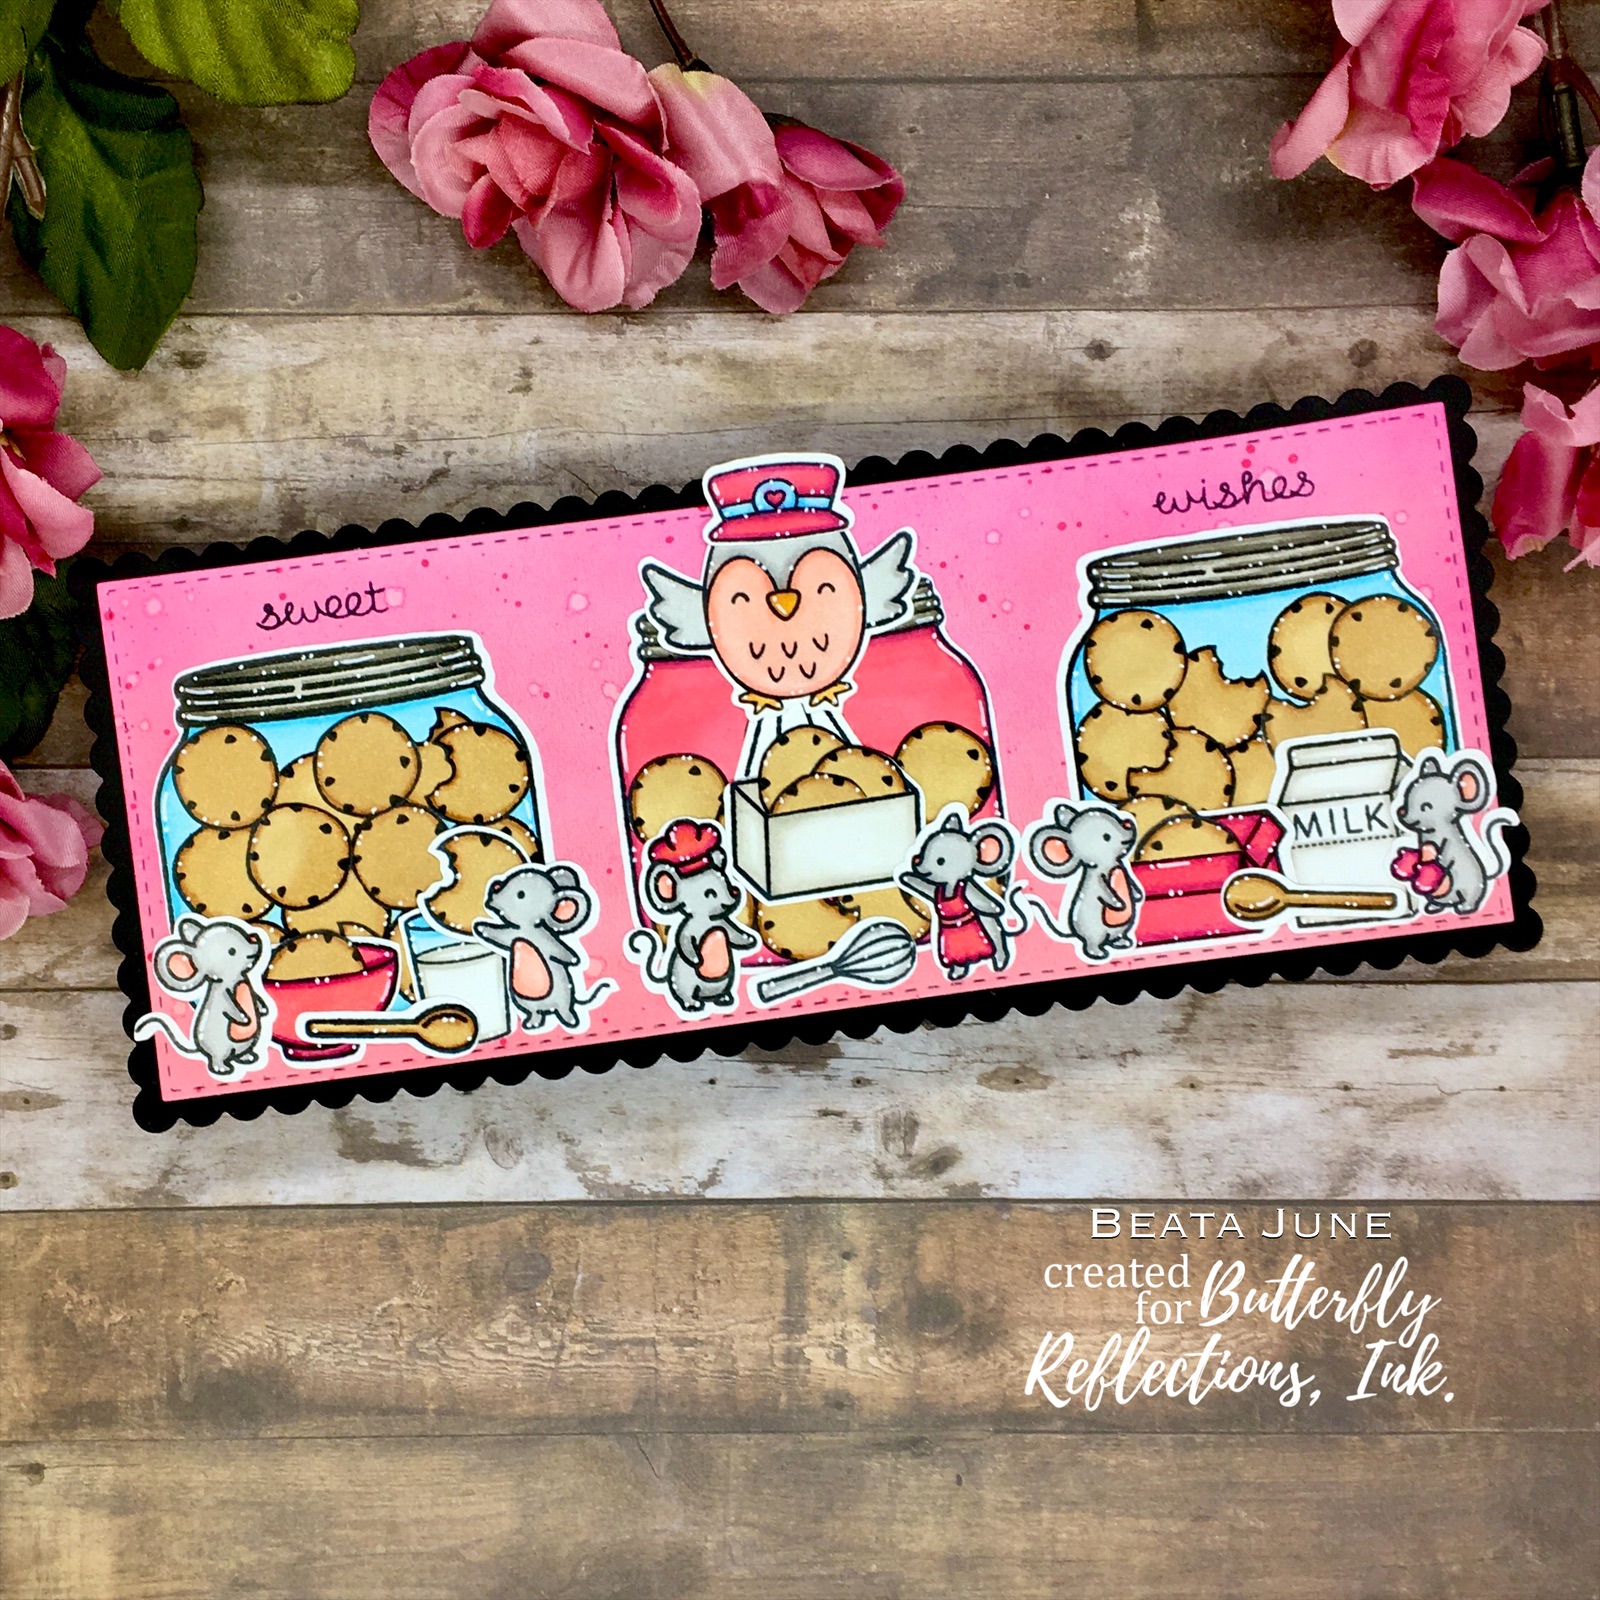
First I stamped out three jars to hold my cookies using the Lawn Fawn How You Bean? stamp set and colored them with copic markers. Then I stamped some chocolate chip cookies 🍪🍪 to fill my jars from the Lawn Fawn Milk and Cookies stamp set, colored them with copic markers, cut them out and glued them inside my jars.
Next, I stamped out the cute mice from the Lawn Fawn A Creature Was Stirring stamp set and Lawn Fawn Dandy Day stamp set and colored them with grey and pink colored copic markers. But my mice couldn't bake all those cookies without some utensils! So I stamped out some bowls, spoons, and whisk from the Lawn Fawn A Creature Was Stirring stamp set, colored them with copics, and cut them out. 🥄🥣
I don't know about you, but I love drinking a glass of milk whenever I eat chocolate chip cookies so I stamped out the milk carton and glass of milk 🥛 from the Lawn Fawn Milk and Cookies stamp set, colored them with copics, and cut them out to go with my cookies.
Then I stamped the owl, wings, and hat from the Lawn Fawn Special Delivery stamp set, colored them with copics and cut them out. I wanted the owl to be delivering some of the cookies, so I stamped out the box and strings from the Lawn Fawn Special Delivery Box Add-On stamp set, colored the box, and filled it with some chocolate chip cookies I colored from the Lawn Fawn Milk and Cookies stamp set. I also thought it would be cute to have some of my mice packing up a box of cookies, so I stamped out another box from the Lawn Fawn Special Delivery Box Add-On stamp set, colored it with pink copic markers, and filled that box with more chocolate chip cookies I colored from the Lawn Fawn Milk and Cookies stamp set.

Here are my stamped images all colored up and cut out! (I ended up rearranging my images and taking out a milk carton and bowl so that my images would fit on the final version of my slimline card.)
After I finished coloring all my stamped images, I cut out a stitched slimline panel from white cardstock and blended it with Spun Sugar, Worn Lipstick, and Picked Raspberry distress oxide inks using Picket Fence Studios Life Changing Blender Brushes. Then I splattered the blended background with water and pink paint. After the water and paint was dry, I glued my slimline card panel onto a piece of black cardstock I cut out with a scalloped border. Then I adhered all my colored images onto the card panel.

To finish up my card, I stamped the "sweet" and "wishes" sentiment from the Lawn Fawn Milk and Cookies stamp set over the top of my first and last cookie jars, and added white highlights using a White Glaze Jelly Roll pen.
Here is my finished card:

Sending sweet cookie wishes to you all!
Crafty hugs,
Beata June 💚💚
Comments
Post a Comment